Huarui Xun advisory hotline
18925718668


Mobile: 18925718668 (Mr. Xue)
Tel: 0769-82002774-8008
Email: xzb@gd-rxml.com
Website: mold.dghrx.cn
Address: Room 102, Building 1, No. 3, Lane 1, Jinfu Road, Fenggang Town, Dongguan City
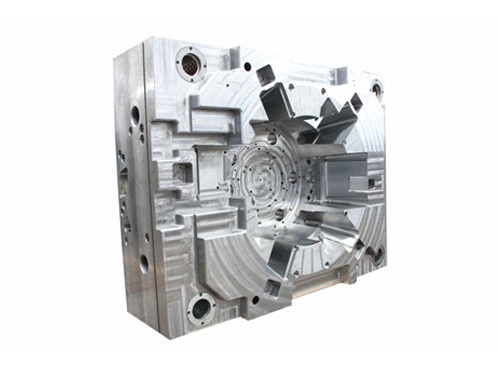
1. Install the lower die
The die die and fixing plate assembly are installed on the die seat under the die die according to the position of the center line. After adjusting the position, the machining screw holes on the lower die seat are fastened with screws, and the pin holes are drilled and rewound, and the positioning plate is installed according to the cutting edge of the die.
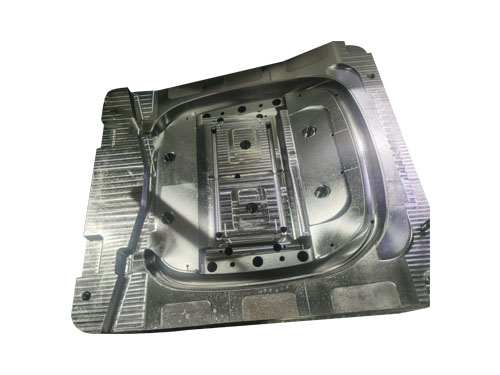
2. Assemble the upper die
Insert the punch that has been installed in the fixed plate into the concave mold hole that has been placed with the gasket, insert the contour cushion iron between the fixed plate and the concave mold, place the gasket on the fixed plate, and then put the mold base. Clamp the upper die seat and the fixing plate with a parallel rolling head, process the screw hole hole of the discharge plate through the fixing plate 7, pass the fixing screw hole with the drilling die seat screw, disassemble the hole and drill the hole, and then fix the upper die seat, the backing plate and the fixing plate preliminarily with screws.
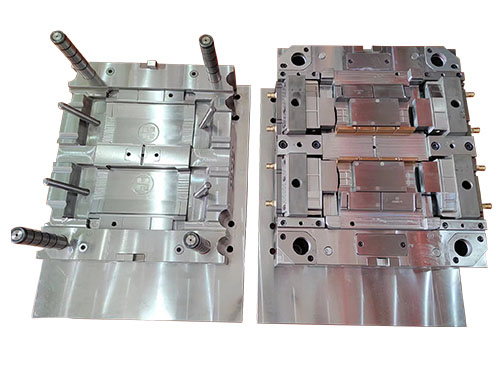
3. Adjust the gap
Take out the concave mold hole gasket of the mold embryo, reverse the mold closing, observe the matching gap between the convex and concave molds from the blanking hole of the lower mold base with the light transmission method, gently knock the side of the fixed plate with the hand hammer to make the matching gap even, and use paper as the test punching material. After adjusting the gap, lock the screw 13. Remove the upper die holder, drill and ream the pin holes, and drive the pin.
Install the discharge plate and spring on the upper die seat with the discharge screw. When the discharge plate is lower, the punch edge should be reduced to about 0-5mm in the discharge plate hole to check whether the discharge plate movement is flexible and stable.
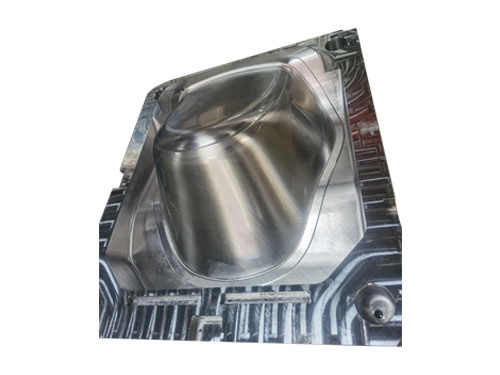
4. Test punching and adjustment Install other parts of the die, use paper as test punching material, and then use specified materials to test punching several pieces, adjust to the punch qualified, print marks for delivery.
Mold full processing, non-standard mold, high precision mold, CNC machining center. Products are widely used in molds, mechanical parts, electronics, electrical appliances, communication equipment and other fields, high quality and low price, trustworthy!
The process of the punch for the die embryo
1. Cut the material. Cut with rolled round bar material on a saw machine.
2. Forging. Forge the bar into a large round blank.
3. Annealing. The forged blank must be annealed to eliminate the internal stress after forging and improve its processability.
4, die lathe processing. Turn the outer circle and the upper end face, drill and boring the #20mm inner hole, turn and boring the +175mm cavity and its bottom surface, and turn the lower end face. Grinding allowance 0.3 ~ 0.5 mm.
5. Line. Mark the position of each hole and punch the center eye at the center of the hole.
6, hole processing. Machining the bottom hole of each screw hole (drilling, tapping) and positioning pin.
7, rough milling tooth shape. The tooth profile is machined on the milling machine.
8, heat treatment. Quenching, tempering, check the hardness 58 ~ 62HRC.
9. Grind the surface. Grind the upper and lower ends on a surface grinder.
10. Grind the outer circle. Grinding the outer circle to the required size on the outer grinder.
11, grinding shape. The shape of the teeth is grinded with the forming wheel on the forming grinder, and the indexing mechanism is used for indexing.
Before grinding the tooth shape, some preparatory work must be done: machining the mandrel (turning, grinding) for clamping the punch and the electrode. Trim the formed wheel that matches the tooth shape. Processing electrode blanks (turning, boring internal holes, rough milling profile, grinding, etc.). When processing, the electrode and punch together through the mandrel, with the nut lock, and then the mandrel installed on the forming grinder, with the forming wheel grinding electrode and punch tooth shape.
12. Coordinate grinding. The cavity and its underside are ground on a coordinate grinder, and the locating pin holes are ground.
13. Finishing. The fitter refines the cutting edge.
 Consult